Communication Access Real-time Translation (CART)
Watch your professor's words appear on the computer screen. Austin Peay provides credit-based classroom interpreting and captioning at no cost to students. Interpreting and captioning services for extra-curricular, departmental, and special events are coordinated by the department facilitating the event.
Students using CART services, either onsite or remote, can be mainstreamed into the traditional school setting. CART can be displayed on a number of different devices depending on the student's needs.
Accurate Captions When It Matters Most
CART providers are experts at grammar, syntax, and proofreading. Our strict code of CART protocol dictates that they will never change verbiage to create a more grammatically correct sentence structure. We believe the student should be reading the words that were actually spoken. This ensures the accuracy of the captions the student receives.
Other Scenarios for CART Services
Cart students attend other educational events like graduation ceremonies, guest speakers and presentations, school assemblies, and even specialty classes outside the classroom.
How Cart Works
CART provides a real-time translation of spoken English into written English text displayed on a device like a laptop monitor, tablet, or cell phone. This allows the student to read what is being said during a lecture and discussion class session.
Real-time captioning services are scheduled by the Disability Student Success Center (DSSC) upon request from the student with an approved accommodation.
The captioning service may need to work directly with the instructor and DSSC to gain access to the course materials and become familiar with the course content. All assignments and course-related information will be kept confidential. DSSC covers the cost of real-time captioning services for students with a CART accommodation.
Student's responsibility to:
- Communicate with DSSC and the CART provider with at least 24-hour notice prior to the beginning of any class that will be missed. CART providers are only scheduled for classes in which you are in attendance.
- Inform DSSC and the CART provider of any changes to class schedules, including course drops/adds, classroom changes, additional review sessions, etc.
- Communicate with the CART provider if you have questions or concerns regarding the services provided.
- If, after working with the CART provider, you continue to have concerns regarding services being provided, contact DSSC
CART provider's responsibility to:
- Be punctual to obtain the best possible seating and set up equipment without disrupting the class.
- Inform DSSC of any absence requiring a substitute CART provider so we can arrange to cover that class.
- Wait 20 minutes if you know who your student is and they are not in attendance before you leave class.
Connect Rode Wireless GO to a laptop
To connect a Rode Wireless GO to a Dell laptop, you can use the supplied cable, turn on the devices, and select the Wireless GO as your computer's audio device.
-
Step 1: Connect the Wireless GO to your laptop using the supplied cable. If your laptop has USB-A ports, use the SC20 cable. If your laptop has USB-C ports, use a USB-C-to-C cable.
-
Step 2:
-
Turn on the receiver by pressing and holding the power button for three seconds.
-
Turn on the transmitter by pressing and holding the power button for three seconds.
-
The transmitter and receiver should automatically pair.
-
-
Step 3:
-
Select the Wireless GO as your computer's audio device.
-
Go to your sound settings or preferences.
-
Select “Wireless GO RX” as the input device.
-
Trouble shooting:
If you're having trouble connecting your Wireless GO, you can try using a different USB port on your computer. You can also try connecting the Wireless GO to another computer or device.
This video can also help you learn how to connect a Rode Wireless GO to a computer:
Using the Rode Wireless Go with Zoom
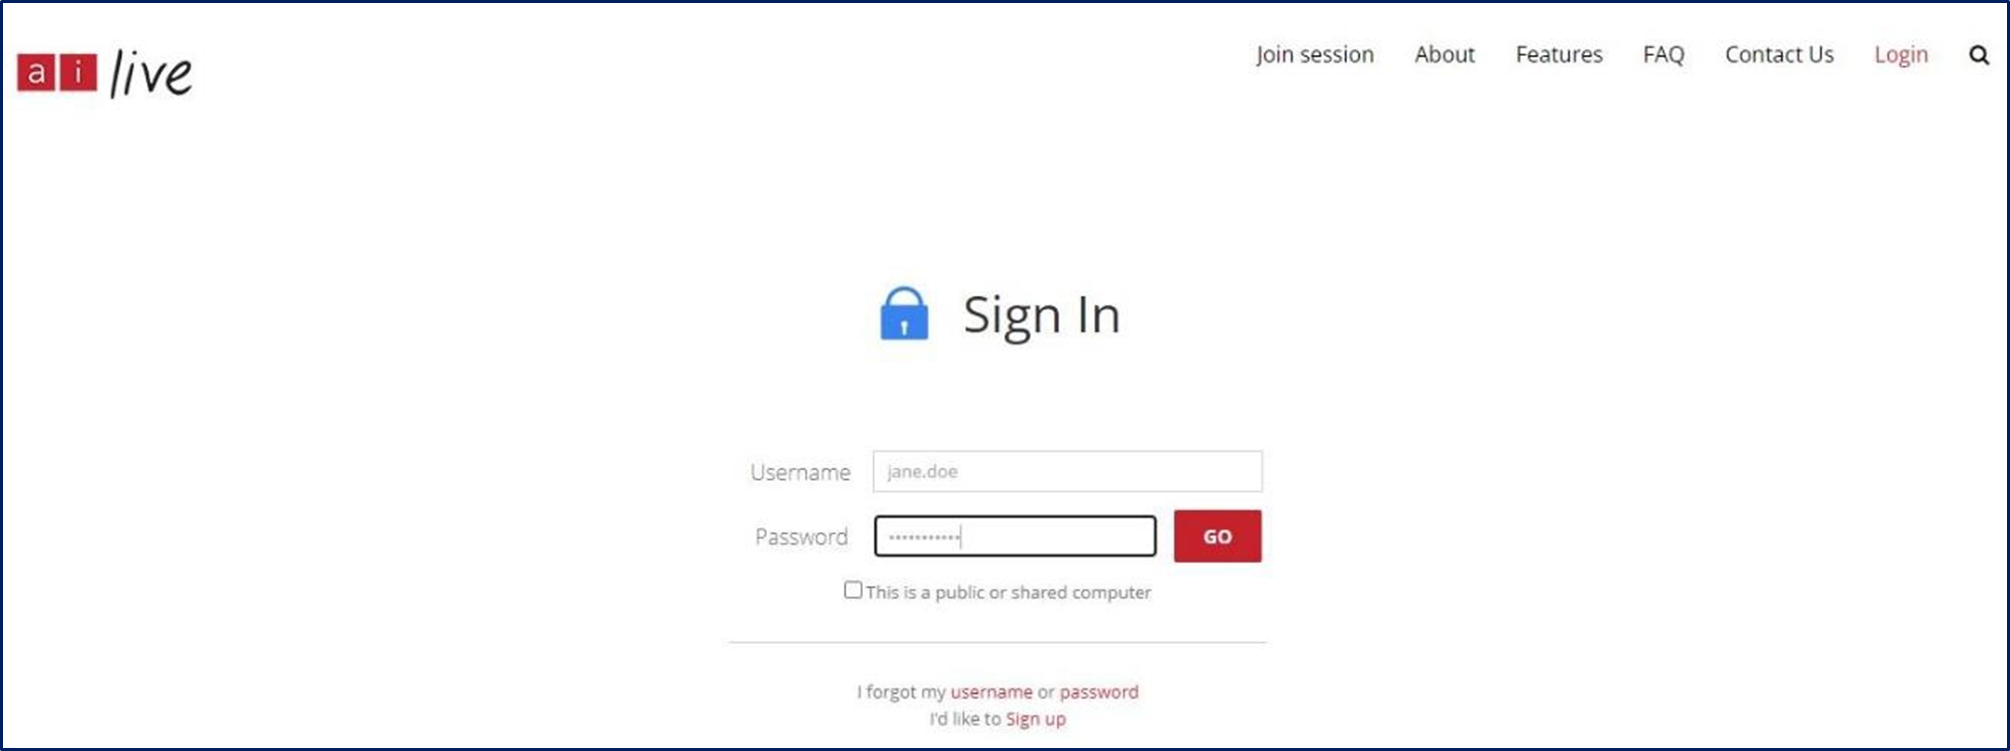
Logging into AI-Live
Navigate to https://www.ai-live.com/sign-in/ and enter your login credentials. Once you’ve entered your credentials, click on the ‘Go’ button.
Once logged in, you are taken to your AI-Live portal.
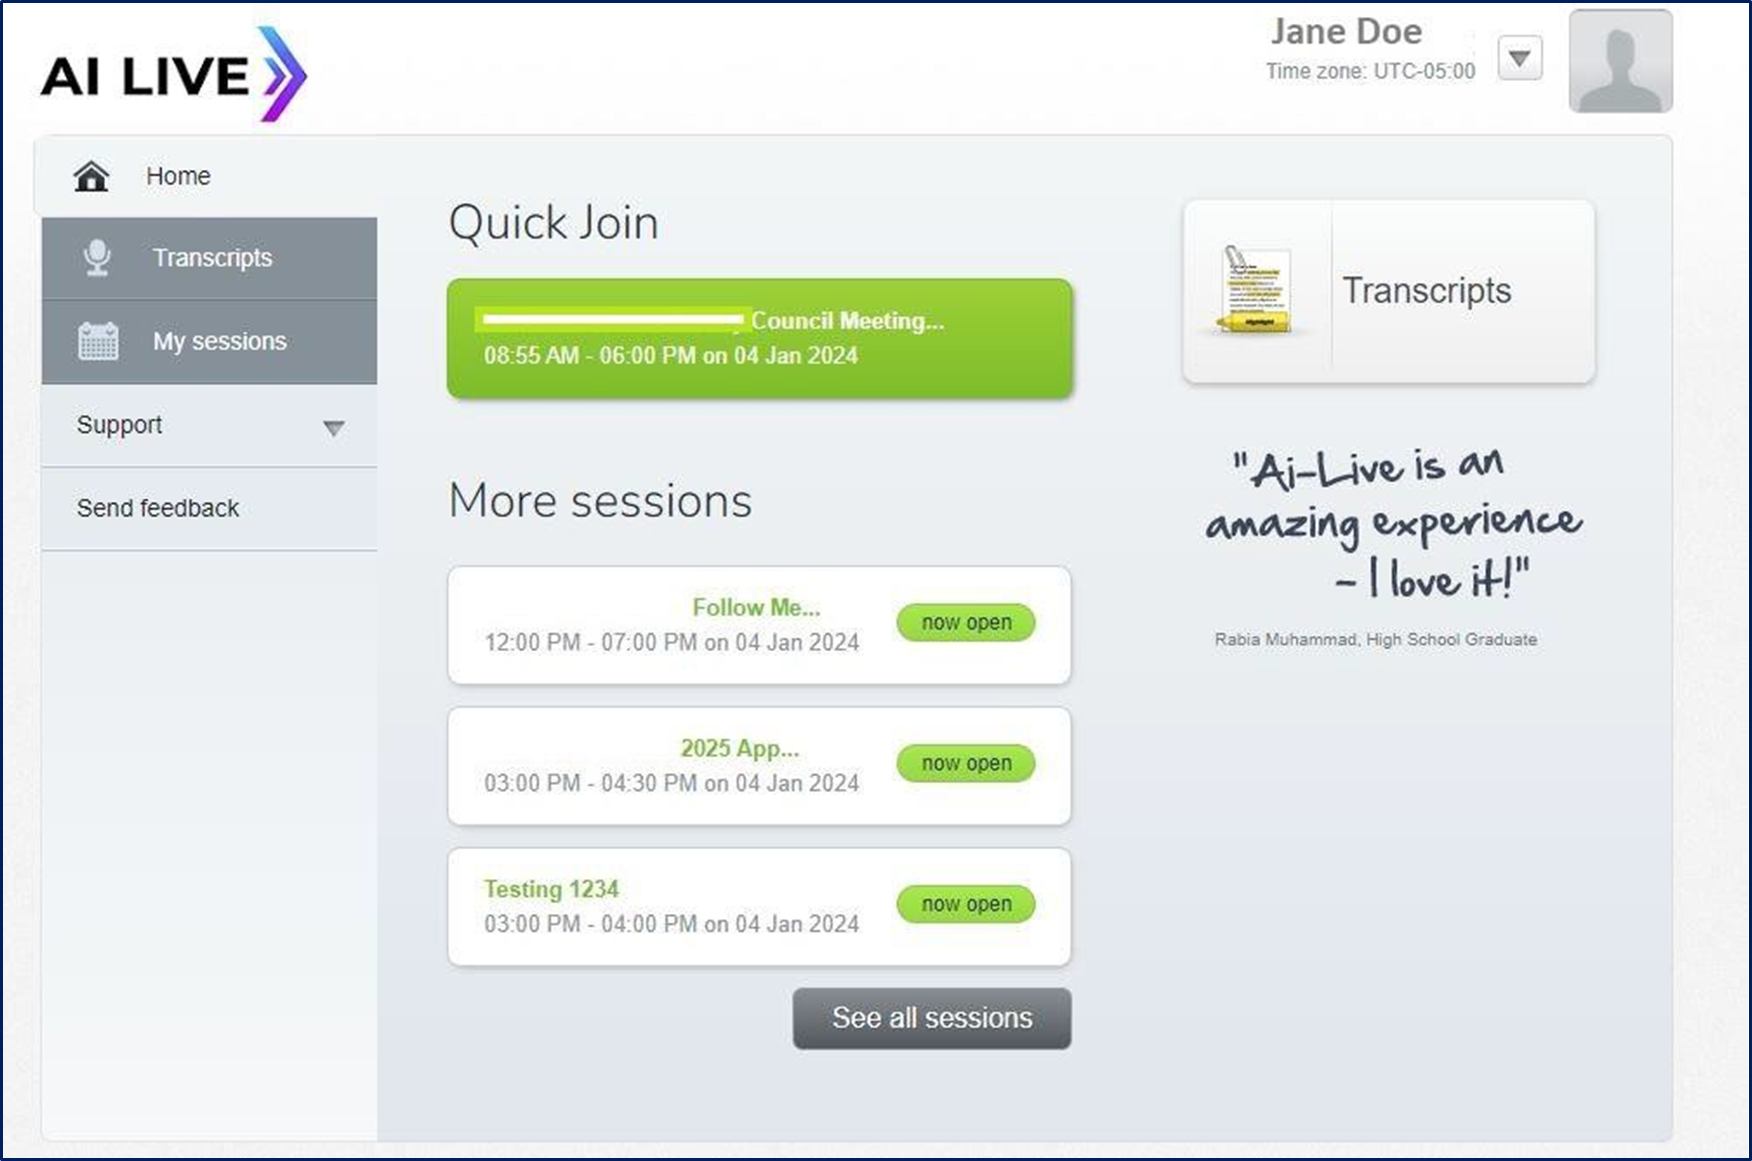
Viewing your Bookings
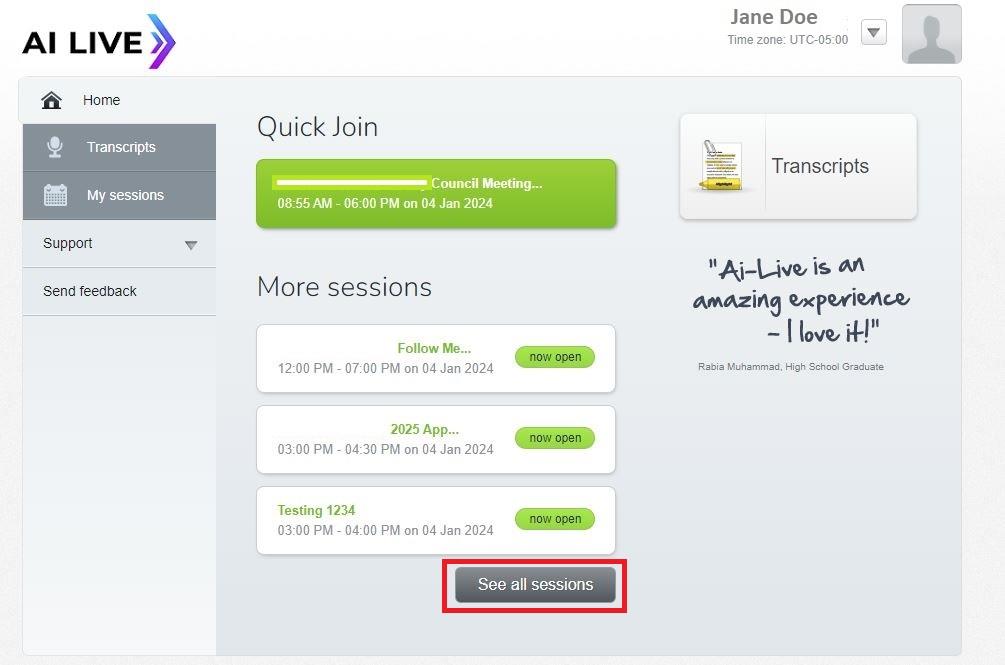
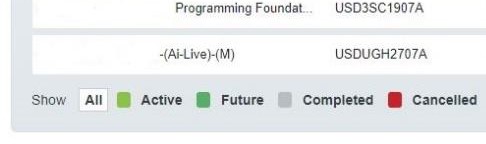
From the AI-Live portal, you can view all of your completed and future sessions by clicking on the ‘See all sessions’ button.
You will be shown a list of all of your sessions, arranged from your first session to your last.
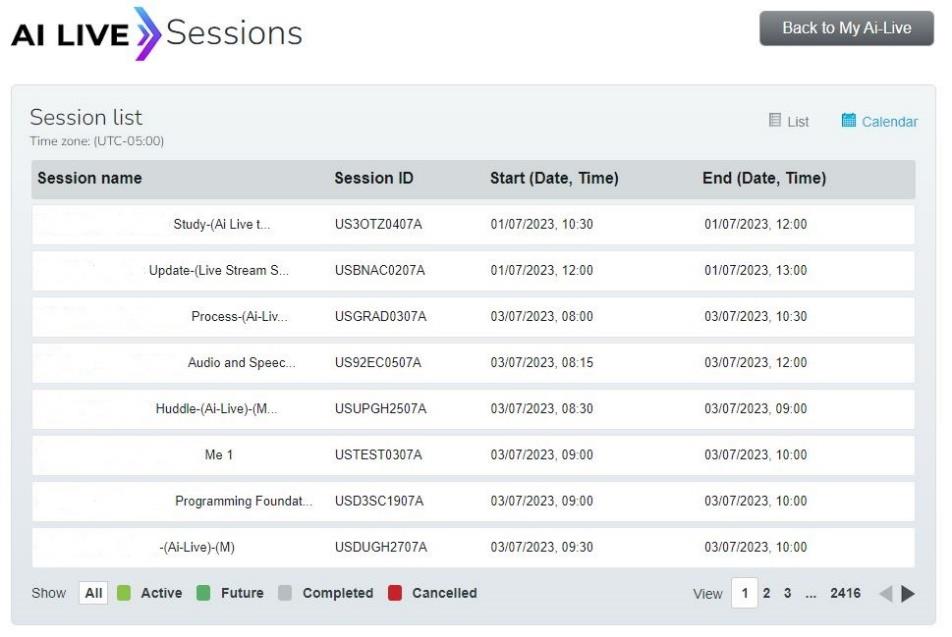
You can change your session view by selecting either ‘All’, ‘Active’, ‘Future’, ‘Completed’ or ‘Cancelled’ along the bottom of the screen.
You can also change to calendar view to be able to see your sessions displayed in a weekly or monthly calendar. You can do this by clicking on the ‘Calendar’ button.
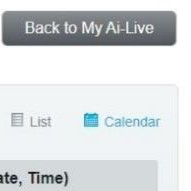
Once in Calendar View, you can cycle through ‘Day’, ‘Week’ or ‘Month’ view.

The sessions in the Calendar View are color-coordinated.
-
Green = Active sessions
-
Dark green = Future sessions
-
Grey = Completed sessions
-
Red = Cancelled sessions
Accessing an AI-Live Session
To Access an AI-Live session, click on the green ‘Quick Join’ button if it is active, or is about to start. If the session you’re wanting to access isn’t in green, you can find it using the ‘See all sessions’ button.
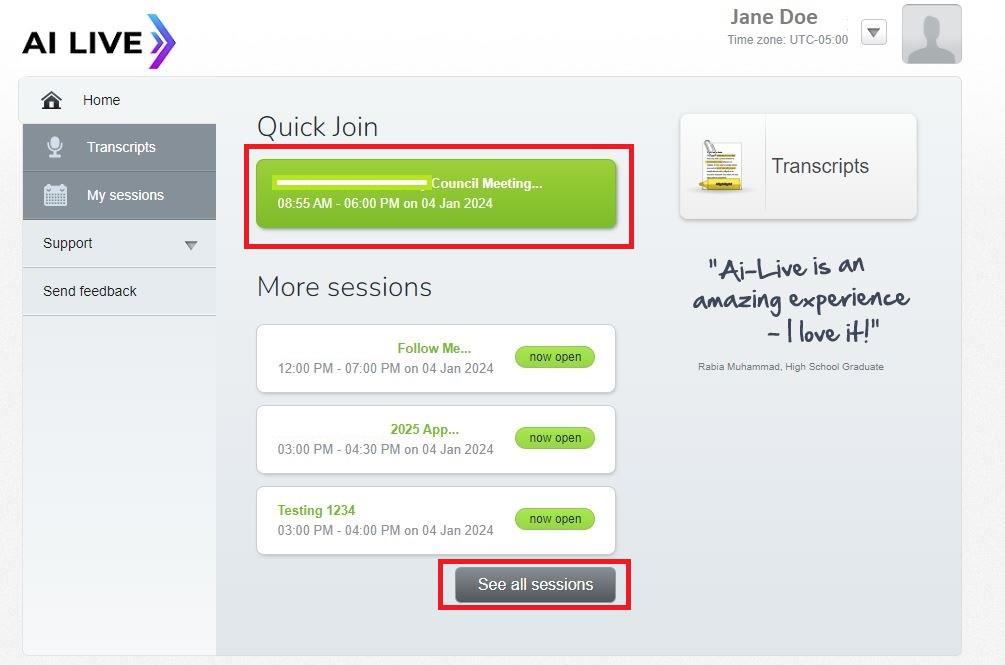
Until your session is active and someone has started speaking, the session will appear blank. The AI-Live caption Viewer will remain blank until your meeting or lecture has started. Once the session has begun, captions will begin to appear within the session.

AI-Live Session Features
Once you have accessed your AI-Live session, there are a few features that you can utilize to customize the captioning display to your liking.
These features include the chat panel, changing the font and color scheme, hiding the toolbar, providing feedback and requiring assistance from our Helpdesk Team.
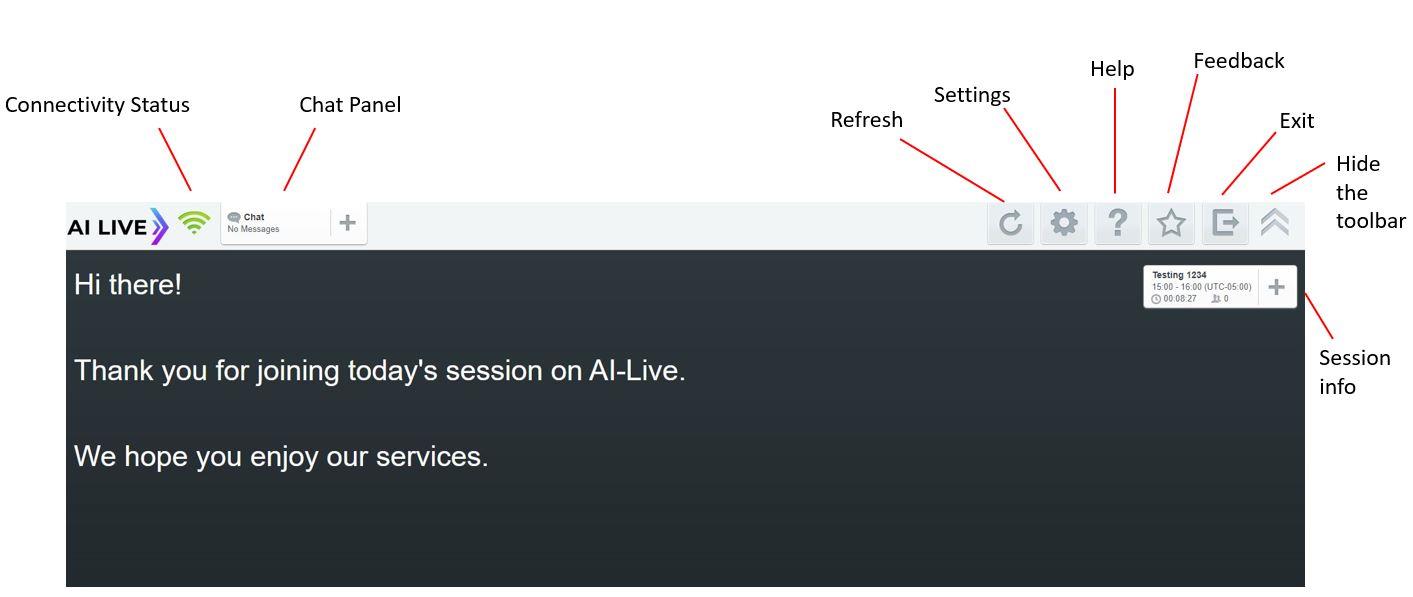
The Chat Panel
The chat panel is an invaluable tool for communication between you (the viewer) and your captioner(s). Contact the captioner(s) to confirm they are receiving audio, or to let them know that your session is maybe running late or overtime.
Changing Fonts, Font Size & Color Scheme
The first time you log into an AI-Live session, the settings will have your font, size and color set to Arial, medium size, white text on black background.
Hiding the Toolbar
To hide the toolbar whilst in the AI-Live Caption Viewer, you can click the ‘Hide’ button (upward arrows icon).
Feedback
At any time throughout your session or at the end of your session, you can give feedback on the captioning you received via the ‘Feedback’ function within the AI-Live Caption Viewer. Click on the ‘Feedback’ button (star icon) to bring up the feedback window