Video & Audio Files
Captions (not subtitles)
Closed captioning refers to the process of displaying the audio of a video as on-screen text. This involves a process that divides transcript text into chunks, known as caption frames. Each frame is time coded and synchronized with the audio of the video.
Captions are the text versions of spoken words and important sounds in a video. Unlike subtitles, captions are created for people who are deaf or hard of hearing, and they include both dialogue and meaningful sounds (e.g., laughter, music, applause).
-
Essential for students who are deaf or hard of hearing.
-
Helpful for English language learners.
-
Useful in noisy or quiet spaces where audio isn’t an option.
-
Supports study, review, and learners who prefer reading.
-
Add captions to all prerecorded videos you use or create.
-
Make sure captions are accurate, synchronized, and complete.
-
Most tools, like YouTube and Zoom, can generate machine captions. While machine captions have gotten more accurate over time, they still require review and some editing.
Live Captioning
Live captioning provides real-time text for spoken content during synchronous virtual meetings.
-
Supports students who are deaf or hard of hearing.
-
Helps anyone in noisy or quiet spaces where listening to audio isn’t possible.
-
Aids comprehension for non-native English speakers.
-
Enable built-in live captioning in Zoom or Teams.
-
Let students know that live captioning is available and directions for how to turn it on.
Audio Descriptions
Audio descriptions are short narrations that explain important visual details in a video that does not contain audio so all learners can follow along.
-
Essential for students who are blind or have low vision.
-
Helps students understand charts, graphs, and on-screen text that is only addressed visually
-
Provides clarity when visuals carry important meaning.
-
Describe key visuals aloud when recording lectures or videos.
-
Provide a text version with descriptions for highly visual content.
-
Keep explanations brief and focused on what’s necessary to convey meaning.
Transcripts
give a textual verbatim account of the audio portion of a video or audio recording. The text generated in a transcript is derived from verbal dialogue and descriptions of sounds that give the recording meaning and context, such as [applause], [coughing], [upbeat music].
-
Essential for students who are deaf or hard of hearing.
-
Helpful for students with unreliable internet connections.
-
Supports study and review by allowing learners to scan and highlight text.
-
Benefits students who prefer reading alongside listening for better retention.
Post transcripts alongside video or audio files in D2L.
How do I assign closed captioning to course videos?
Austin Peay State University uses Media Library to host instructional videos within D2L. When you upload a video to Media Library, be sure to follow the directions below to have the video captioned.
-
Open the Media Library
- Go to your course in D2L.
- From the course navbar, select Tools - Media Library.

-
Choose your video
- Find the video you want to caption and click the three dots (…) or Options, then select Edit.

- Find the video you want to caption and click the three dots (…) or Options, then select Edit.
-
Generate captions
- In the editor, select the Closed Captions
- Choose your language, then click Auto-Generate.
-
Review and edit
- Correct any errors in the caption editor.
- Adjust start/end times if needed.
-
Save
- Select Save Draft if you plan to edit more, or Finish to make captions available to students.

- Select Save Draft if you plan to edit more, or Finish to make captions available to students.
-
Open the video
- Go to your course Media Library and select the video.

- Go to your course Media Library and select the video.
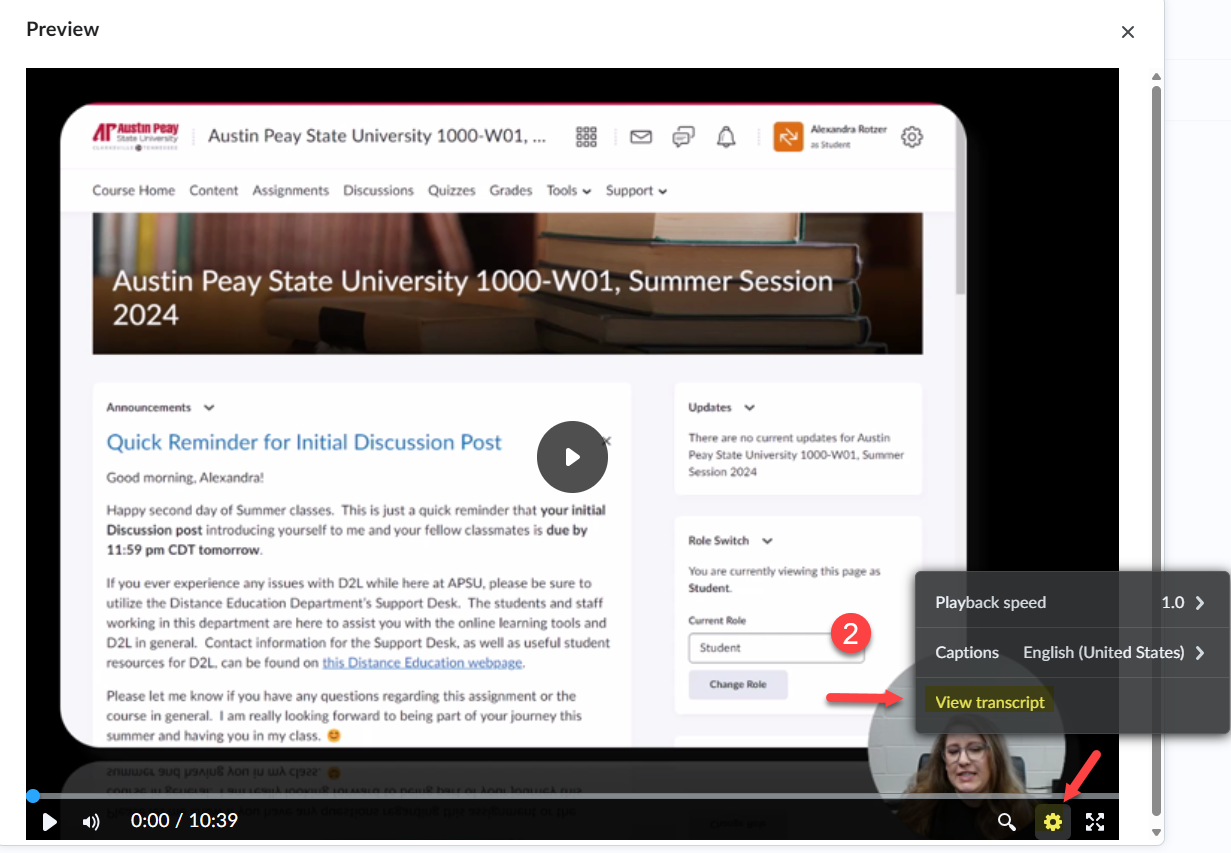
- View transcript
- Choose the video, then select the settings (gear icon) at the bottom right, then View Transcript.
- The transcript will scroll automatically in sync with the video.
- Download transcript (optional)
- If enabled, click Download Transcript to save a text or PDF copy.
- Upload it into your course module if you’d like students to have an offline version.

Tips & Tricks
-
Highlight transcript availability in your syllabus, or under the media file itself in D2L, so students know they can use them as study aids.
-
Audio descriptions don’t have to be long or distracting. Just briefly explain visuals that carry meaning. If the visuals are decorative only, you don’t need to describe them.
Using Accessible Videos in Your Online Courses in D2L Brightspace - Learn how to make videos accessible with captions, transcripts, and audio descriptions using D2L’s Media Library and Video Note tools.
Create and Insert Video Notes in D2L Brightspace - Short tutorial showing how to record, caption, and embed short Video Notes into your course content.
WebAIM: Captions, Transcripts, and Audio Descriptions Website - Clear explanations of why captions, transcripts, and audio descriptions are necessary and how to provide them effectively.